Are you ready to hit the road on your trusty bike but worried about the safety of your brakes? Don’t fret, because we’ve got you covered!
Adjusting your bike’s brakes is a crucial skill that every cyclist should master. Not only will it give you peace of mind, but it will also ensure a smooth and enjoyable ride. In this article, we’ll guide you through the process of assessing your brake performance, identifying common issues, and making the necessary adjustments.
Whether you’re a seasoned rider or just starting out, this step-by-step guide will help you become a pro at adjusting your bike’s brakes. So, grab your toolkit and get ready to take control of your bike’s stopping power.

Let’s dive in and make sure your brakes are in tip-top shape!
1. Assessing Brake Performance
Now it’s time to see how well your brakes are performing, so let’s give them a quick assessment. You want to make sure your bike is safe and ready for any adventure, right?
Well, assessing your brake performance is a crucial step in achieving that. Start by hopping on your bike and taking it for a spin around the block. Feel the power of your brakes as you squeeze the levers. Do they respond quickly and smoothly? Or do they feel sluggish and unresponsive? Pay attention to any strange noises or vibrations that might indicate a problem.
As you ride, try to stop abruptly to test the stopping power of your brakes. Are you able to stop at a reasonable distance, or do you find yourself struggling to slow down? Remember, your brakes are your lifeline, so it’s important to ensure they are in top-notch condition.
If you notice any issues during your assessment, don’t hesitate to take your bike to a professional for a thorough inspection and adjustment. You deserve to feel confident and secure every time you hit the brakes, so take the time to assess your performance regularly.
2. Identifying Common Brake Issues
First, you might notice that your brakes aren’t as responsive as they used to be, which can be frustrating. It’s important to identify common brake issues so you can address them and get your bike back to its optimal performance.
Here are some common brake issues to look out for:
- Squeaking or squealing brakes: If your brakes make a high-pitched noise when you apply them, it could be due to worn brake pads or dirty brake surfaces. Try cleaning the brake surfaces and replacing the pads if necessary.
- Soft or mushy brakes: If your brake lever feels spongy or doesn’t provide enough stopping power, it could be a sign of air in the brake lines. Bleeding the brakes can help remove any air bubbles and restore proper brake performance.
- Brakes dragging: If your brakes don’t fully release after you release the brake lever, your brake calipers may be misaligned or the brake cables may be too tight. Adjusting the calipers or loosening the cables can help alleviate this issue.
Remember, identifying and addressing these common brake issues will not only improve your bike’s performance but also ensure your safety while riding.
3. Adjusting Brake Cable Tension
To get your brakes working smoothly and efficiently, it’s time to make sure the tension on your brake cables is just right. Adjusting the brake cable tension is an important step in maintaining the optimal performance of your bike’s brakes.
When the tension is too loose, your brakes may feel sluggish and unresponsive, making it harder to stop quickly when needed. On the other hand, if the tension is too tight, your brakes may feel too sensitive and grab suddenly, which can be jarring and unsafe.
To adjust the brake cable tension, start by locating the barrel adjuster on your brake lever or caliper. This is a small round or hexagonal-shaped device that allows you to fine-tune the tension. Turn the barrel adjuster clockwise to tighten the tension or counterclockwise to loosen it. Make small adjustments at a time, testing the brakes after each adjustment to ensure they feel just right.
Remember, the goal is to find the sweet spot where your brakes engage smoothly and provide enough stopping power without feeling too grabby. It may take a few attempts to get it perfect, but with patience and practice, you’ll be able to find the right balance.
Once you’ve adjusted the tension, take a test ride to make sure everything feels good before hitting the road.
4. Aligning Brake Pads
Once you’ve ensured the tension on your brake cables is just right, it’s important to align the brake pads for optimal performance. Aligning the brake pads will help to ensure that they make full contact with the rim of your bike’s wheel, allowing for efficient stopping power. Here’s a simple step-by-step guide to help you align your brake pads:
- Loosen the brake pad mounting bolt: Start by using an Allen wrench to loosen the bolt that holds the brake pad in place. This will allow you to adjust the position of the brake pad.
- Position the brake pad: Gently move the brake pad up or down, making sure it aligns with the rim of the wheel. The brake pad should be positioned so that it makes even contact with the rim when the brakes are applied.
- Tighten the brake pad mounting bolt: Once you have the brake pad in the correct position, tighten the mounting bolt using your Allen wrench. Make sure it’s secure, but be careful not to overtighten.
- Test the brakes: Give your brakes a few squeezes to make sure they engage smoothly and that the pads make full contact with the rim. If necessary, make small adjustments to the position of the brake pads until they are aligned properly.
By following these steps, you can ensure that your brake pads are aligned correctly, allowing for optimal performance and a safer ride. Happy riding!
5. Testing and Fine-Tuning Brake Function
It’s crucial to make sure your brakes are working flawlessly for a worry-free and exhilarating ride. After aligning your brake pads, it’s time to test and fine-tune the brake function.
Start by squeezing the brake lever and make sure it engages smoothly without any resistance. If you feel any sponginess or the lever goes all the way to the handlebar, it’s a sign that there might be air in the brake system. You can fix this by bleeding the brakes or taking your bike to a professional mechanic.
Next, check the brake pad contact on the rim. As you squeeze the brake lever, pay attention to how the pads contact the rim. Ideally, the pads should hit the rim evenly and symmetrically. If one side is closer to the rim than the other, you can adjust it by loosening the bolt holding the brake arm and repositioning the pad.
Once the contact is even, test the stopping power. Find a safe area to ride and gradually increase your speed. Then, apply the brakes firmly to see if your bike comes to a quick and controlled stop. If the stopping power is weak, try tightening the brake cable or adjusting the brake pad position.
Remember, fine-tuning your brakes is essential for your safety and confidence on the road. With properly adjusted brakes, you can enjoy a worry-free ride and fully immerse yourself in the biking community.
Frequently Asked Questions
How often should I replace my bike’s brake pads?
Do you want to ensure your bike’s safety and performance? Replace your brake pads every 1,000-2,000 miles or if they are worn down to 1/8 inch. This will keep you in control and part of the biking community.
Can I use any type of brake pads on my bike?
Yes, you can use different types of brake pads on your bike, but it’s important to choose ones that are compatible with your brakes. Check your bike’s manual or consult a professional for the right ones.
What should I do if my brake lever feels loose or spongy?
If your brake lever feels loose or spongy, you should first check if the brake pads are worn out or if there’s air in the brake line. Adjusting the brake cable tension or bleeding the brakes may be necessary.
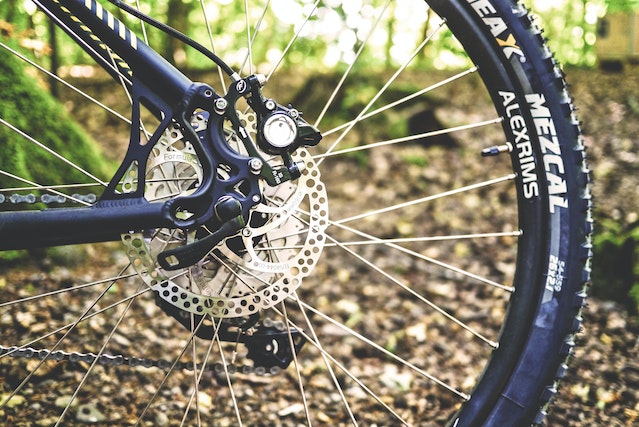
Can I adjust the brake tension on my bike if I have disc brakes?
Sure, you can totally adjust the brake tension on your bike if you have disc brakes! It’s a piece of cake. Just follow these simple steps and you’ll be riding smoothly in no time.
How do I know if my brake cables need to be replaced?
To know if your brake cables need to be replaced, check for signs of fraying or corrosion. Also, listen for squeaking or grinding sounds when you apply the brakes. If in doubt, it’s best to have them inspected by a professional.
Conclusion
Congratulations! You’ve successfully mastered the art of adjusting your bike’s brakes. Now, with your newfound expertise, you can ensure a smooth and seamless ride every time.
So go ahead, and embrace the thrill of the open road, knowing that your brakes are finely tuned and ready to handle any obstacle that comes your way. It’s time to pedal with confidence and experience the joy of effortless stopping power.


